Creating Templates using awisto OfficeIntegration Template Editor
Prerequisite
When your administrator already followed the steps described in Centralized Deployment of the Template Editor Word 365 Add-in you can continue with following actions.
Activate Template Editor inside Word
- Open an existing word template or you create a new word template inside word.
- Click on
Template Editorin the top if the ribbon bar. - An integrated window will be open, where you have to drop you generated
Xml data sourcefrom Creating Templates. - You can now see all populated fields of the data source.

Word with loaded template editor
Xml data source is stored inside your document
The data is attached to your document. Next time your launch the Template Editor with the same document, the datasource is avaiable immediately.
Adding Fields to Your Document
You can now easily click on the elements of the right side of the window by adding this to your document. Also when you select a Group like Customer you see all fields within this group.

Inserted Customer group
For repeating elements, e.g. Invoice Products you can add default word element, like tables, bullet points or other word elements and select the list. So you can also add the fields after you select the list.
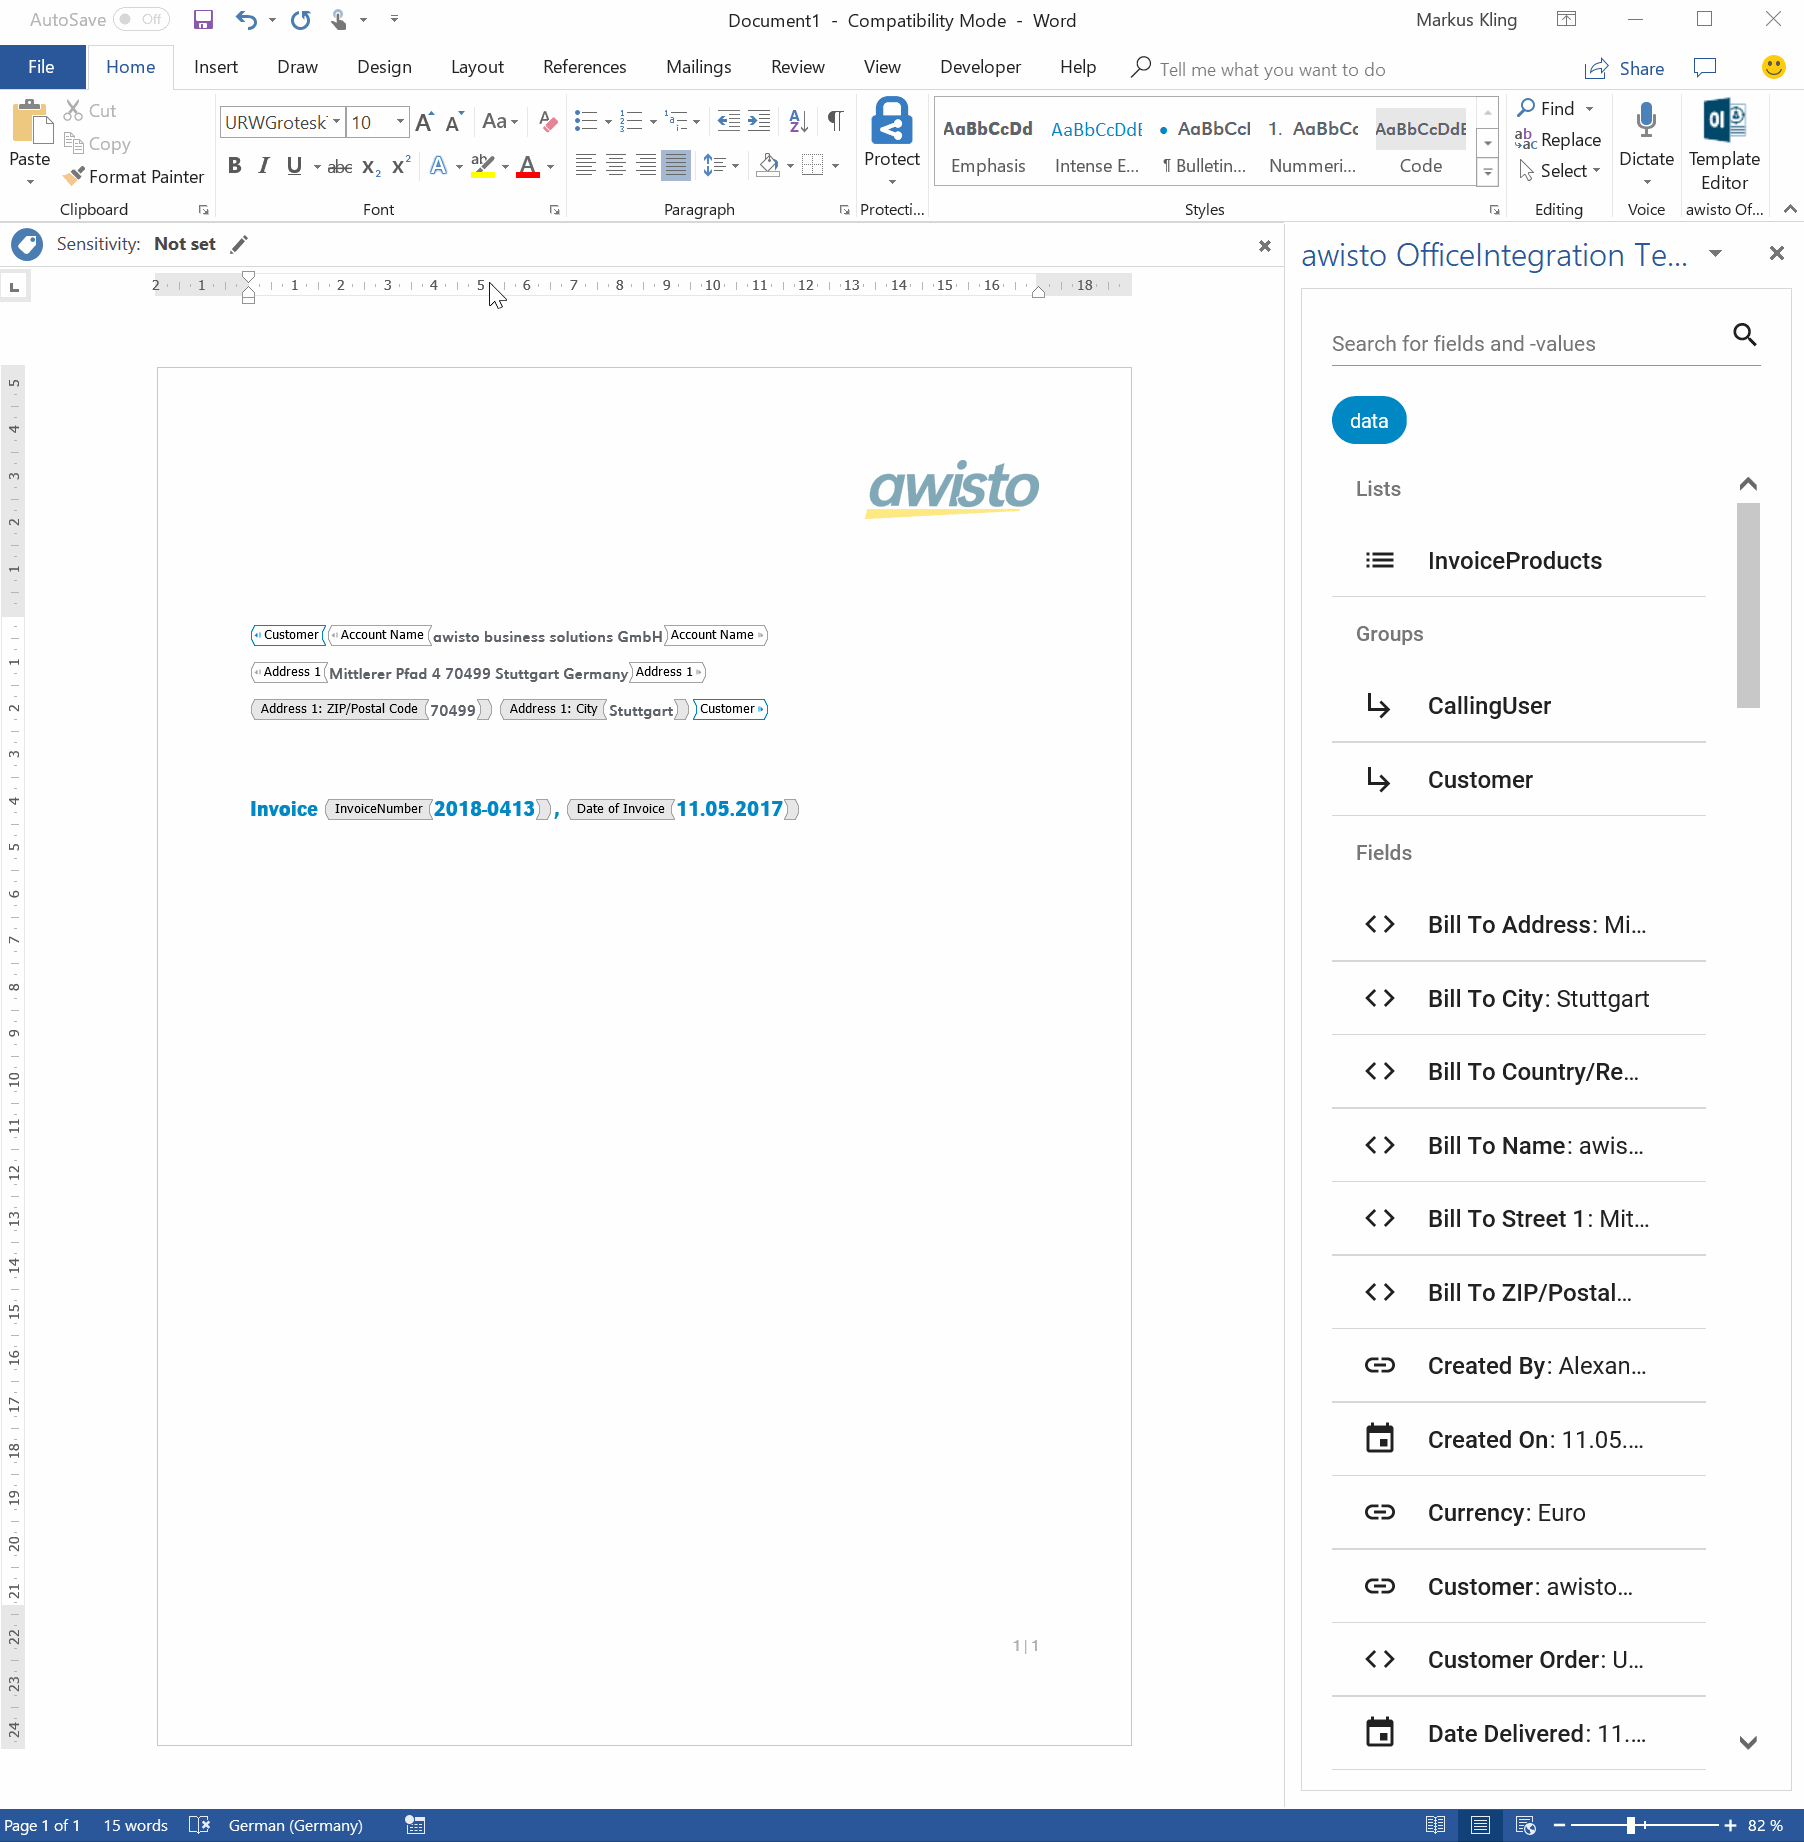
Table with repeated element
Searching for Fields
Because of the large amount of fields within an data source, you can also use the search function, to search for a field within the data source. You can find the fields by searching for Display Names (Existing Product), Schema Names (productid) or Values (awisto OfficeIntgeration CAL)

Search for fields