Integrate 3rd Party Systems Through WebHooks
This engine helps you to integrate other systems after document generation. After a document has been generated it can be handed over for further processing and/or archiving to an external system.
Configuration
You can create a new engine through the user interface. Please set the following properties accordingly.
- Type: awisto.Xrm.OfficeIntegration.Engines.WebHook.Engine
- Assembly: awisto.Xrm.OfficeIntegration.Engines.WebHook
- Configuration
- Engine:
Word,PDF,TextorNone - Url: Full qualified HTTPS webhook URL that accepts a HTTP
POST - TimeoutSeconds: Specifies the Timeout after the webhook call times out (the given url). The default value is 120 seconds for two minutes.
- Mappings: Each XPath maps a datasource value to a named parameter that can be utilized in the WebHook.
- Engine:
Engine None
When the engine is set to none, the WebHook Engine will submit the preview XML to the source instead of a rendered document.
Example
{
    "Engine": "PDF",
    "Url": "https://mywebhook.url/path",
    "TimeoutSeconds": 300,
    "Mappings": {
        "Title": "//Opportunity/title"
    }
}
HTTP Payload
You can download the JSON schema for the HTTP payload via the given link. The two available engines (Word/PDF) always produce a JSON response as shown below.
The Format field of the response is always set to the value File.
The CustomProperties are filled according to the Mappings given above.
An example payload is given below
{
    "Format": "File",
    "ContentType": "application/vnd.openxmlformats-officedocument.wordprocessingml.document",
    "Filename": "document.docx",
    "Content": "*** base64 encoded file contents ***",
    "CustomProperties": {
        "Title": "Some value"
    }
}
Example WebHook using Microsoft Flow
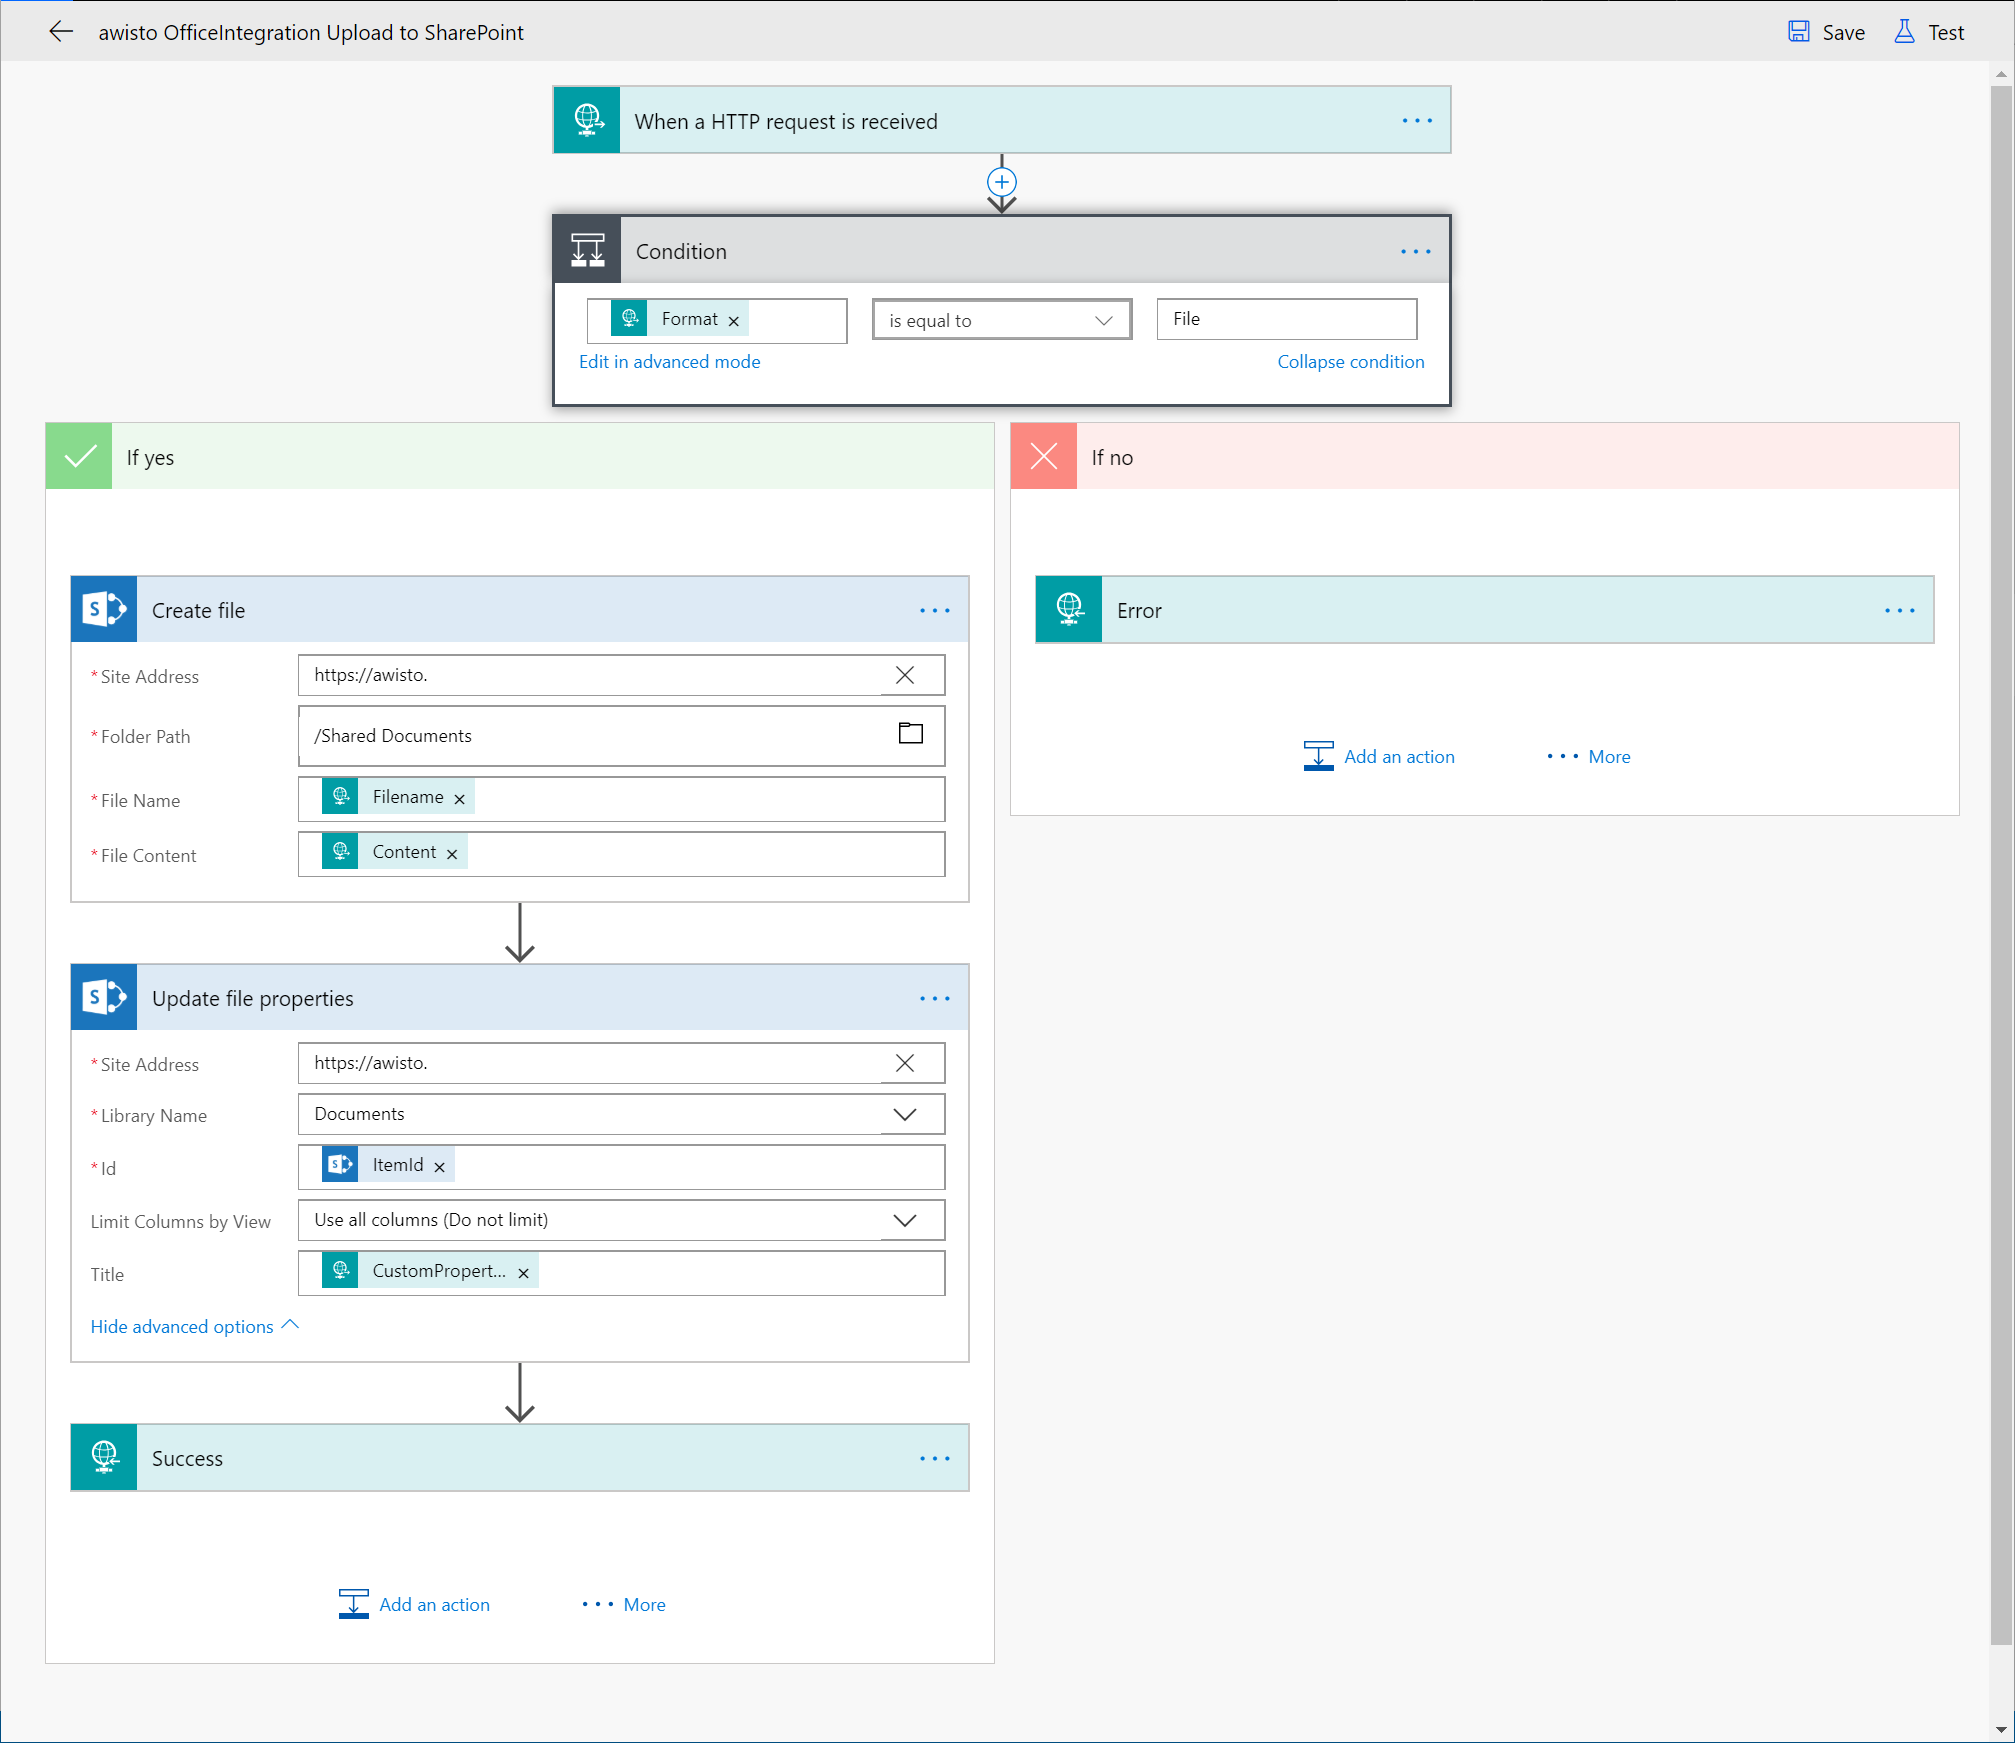
Within this example Microsoft Flow is used as webservice to recieve the rendered file. The flow consumes the document, uploads it to a SharePoint Site and tells the client to redirect to the location in SharePoint which allows for direct editing.
Example WebHook using Microsoft Flow
Create Your Flow
- Login to flow.microsoft.com and choose Create from blank
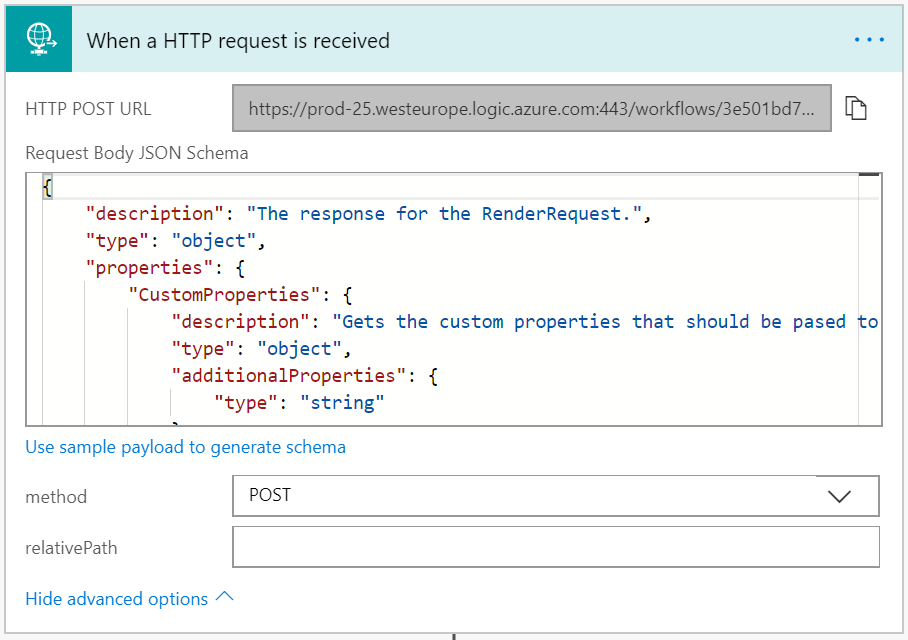
- Start with adding a Request - When a HTTP request is received trigger
- Copy paste the Schema to the request body
- Set the method to
POST
- Add a condition
Format is equal to File, to ensure that you only process files. - In the
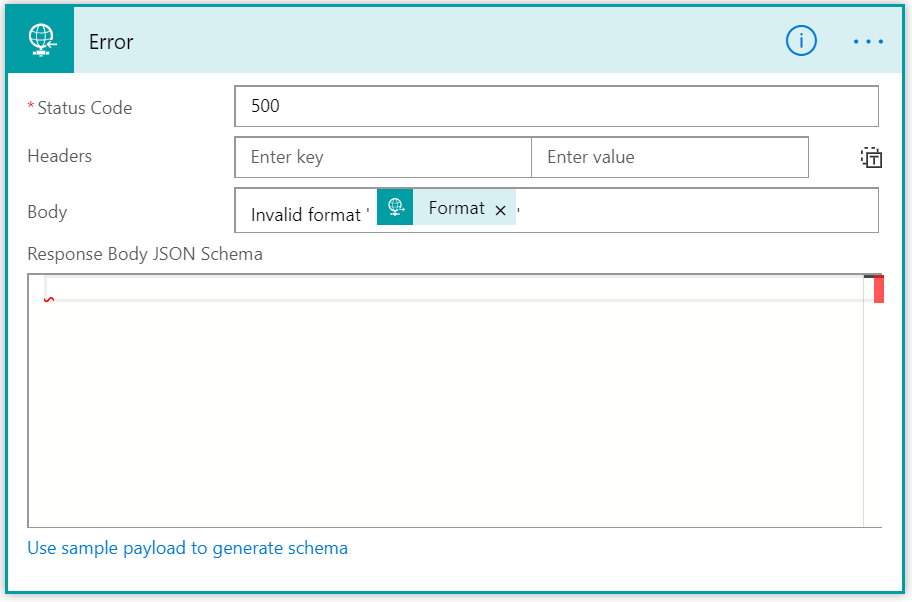
If nobranch add a Request - Response action. In case of failures return500to the caller and an appropriate message. Those messages will be displayed by to the client.
- In the
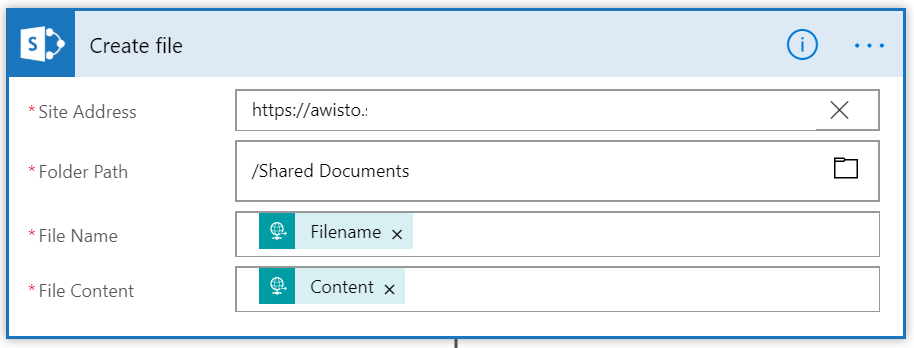
If yesbranch add actions to upload the file to SharePoint.Filenamecontains the documents filename and the variableContentit's contents accordingly.
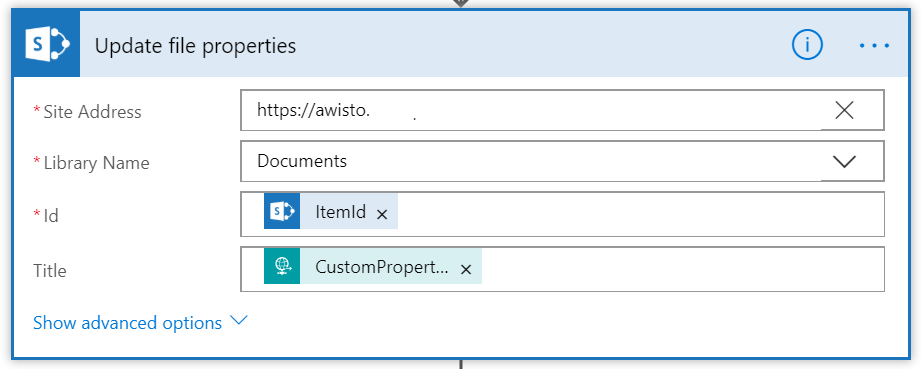
- Add a second SharePoint action to modify the file properties and set the
Titleto your mapped variable. You can access each property by the dynamic expressiontriggerBody()['CustomProperties']['Title']. ExchangeTitleaccording to yourMappings.
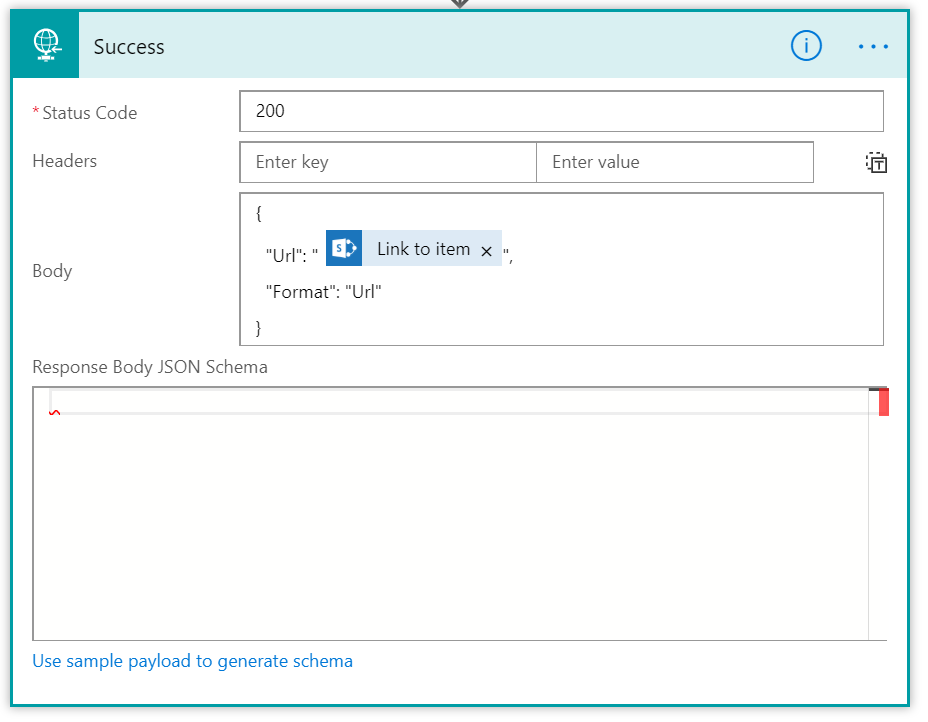
- Add a Request - Response action. Return
200to indicate success. Be sure to return a JSON structure that satifies the input you received. In this case, we return a link to the newly created file and the user is redirected to the new file.
Url to your webhook
The URL to your webhook is only available after your saved your flow. The url is digitally signed and can only be called if exactly stated like you copied it from the Flow environment. Be sure to treat the URL like any other secret as it allows calling the logic you just implemented.
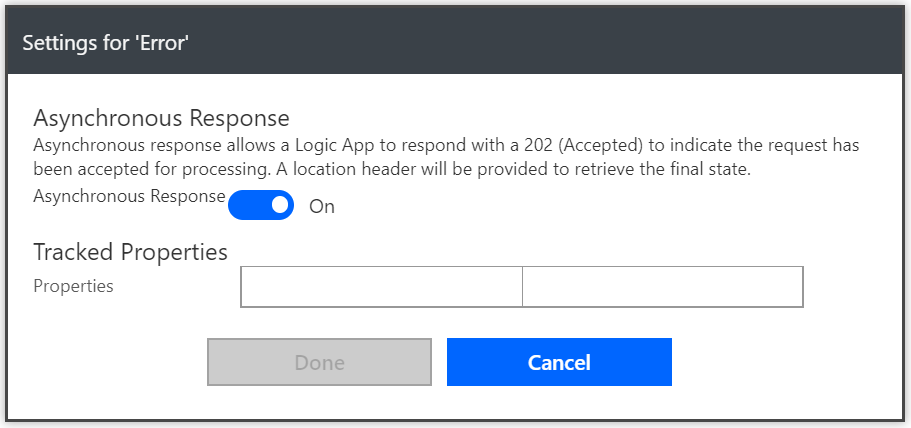
Use Asynchronous Processing
Microsoft Flow and awisto OfficeIntegration are optimized to offload processing and waiting time to the client. Such, ensure that you enable Asynchronous Response for all responses.
You can access that propery by clicking ..., then Settings in each of the Request - Response actions.
Available Return Values
Tell the client to redirect to a URL.
{
    "Format": "Url",
    "Url": "https://www.awisto.de"
}
Close the client window right away.
{
    "Format": "Nothing"
}
Show a message
{
    "Format": "RawOutput",
    "ContentType": "text/html",
    "Content": "<b>A message</b>"
}