Install the Microsoft Power Automate Connector
The awisto Office Integration can be integrated with Microsoft Power Automate. Once the integration is complete, Power Automate can utilize awisto OfficeIntegration to create documents. The required steps to complete the installation are described within this documentation.
Step 1 - Create the Azure AD Application
As first step you need to create an Azure AD Application for the usage of awisto OfficeIntegration within your environment.
- Navigate to Azure Portal and sign-in
- Select Azure Active Directory, App registrations
- Click New application registration
- The Application Type must be set to
Web app / API - Sign-on URL should be set to
https://europe-001.consent.azure-apim.net/redirect
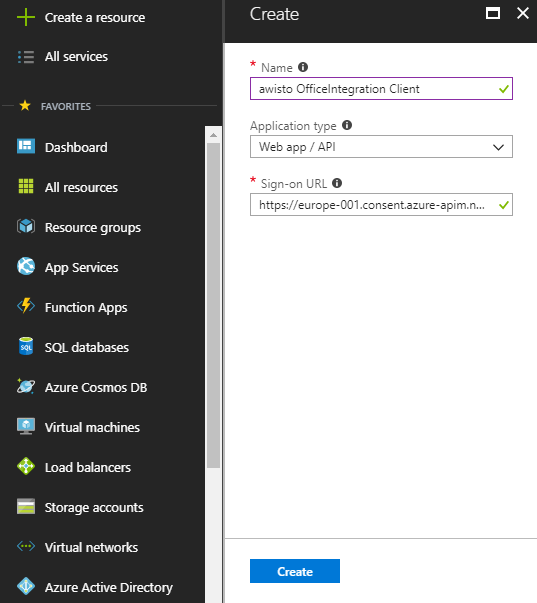
Open the Azure Active Directory within your Azure Portal and create a new application.
Reply URL
Later you have to change the Reply URL. This Reply URL will look like https://europe-001.consent.azure-apim.net/redirect or https://global.consent.azure-apim.net/redirect.
You will find the required step with the end of this instruction.
Step 2 - Request Permissions from Users
When you access your application from withing Microsoft Power Automate, you need to access awisto OfficeIntegration and such request permission to do so.
- Navigate to Required permissions
- Select awisto OfficeIntegration as API
- Tick the checkbox left to Access awisto OfficeIntegration
- Click Select and Done
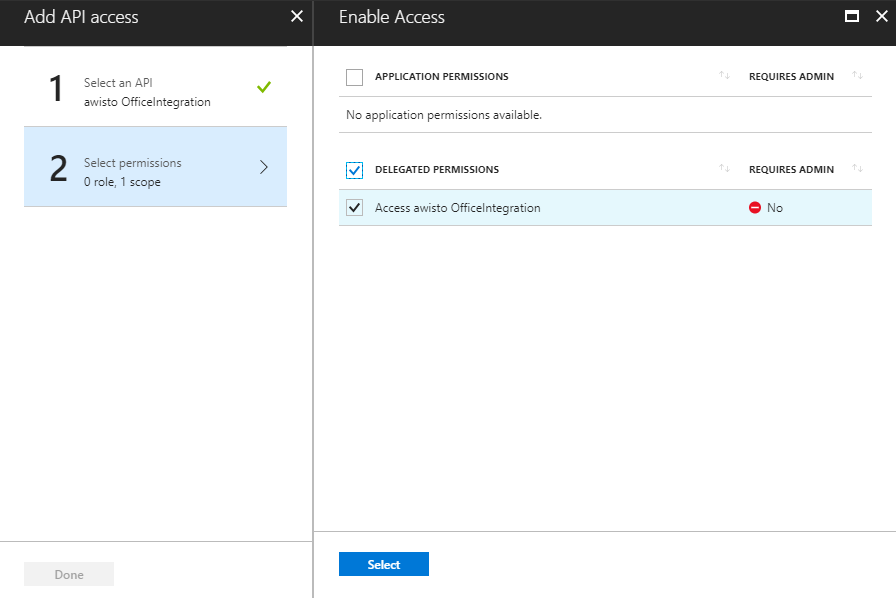
Request permission to access awisto OfficeIntegration
awisto OfficeIntegration Swagger is the wrong permission
You may see two APIs named awisto OfficeIntegration. Be sure to not select the API that request Access awisto OfficeIntegration Swagger permission.
Step 3 - Edit Manifest
- Click Manifest
- Click Edit
- Look for
oauth2AllowImplicitFlowand change the value totrue

Per default oauth2AllowImplicitFlow is set to false, change it to true to allow the usage of oauth2AllowImplicitFlow
Step 4 - Get Application ID and Secret
You will need the information you specified here within Microsoft Power Automate. First you need to notice the application id of the created application.
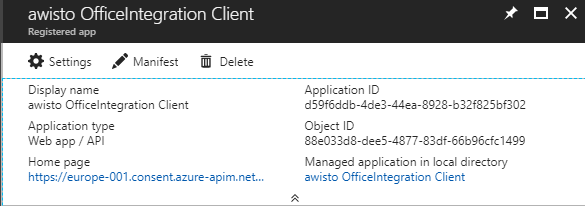
Extract the Application ID from the overview screen
Second, you need to add a new password to the secrets.
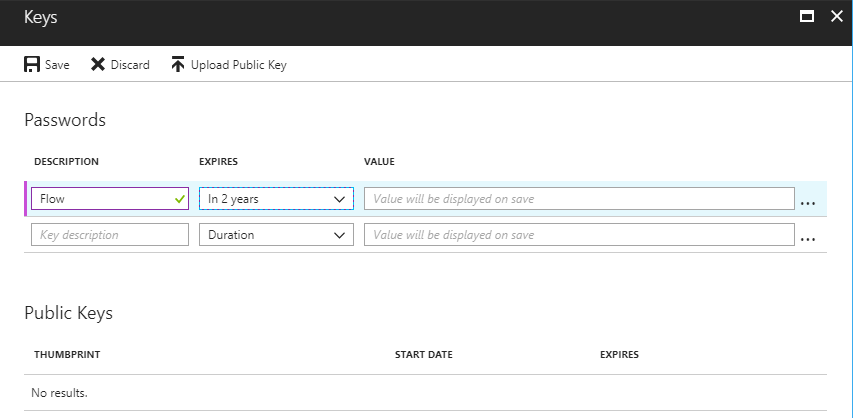
Second you need to add a secret
Warning
For security reasons do not store the secret. Create a new secret if you need it again.
Step 5 - Create a Custom Connector within Microsoft Power Automate
- Create a new connector from Import an OpenAPI from URL
- Name is
awisto OfficeIntregration - Specify
https://officeintegration-docs.awisto.cloud/swagger/OfficeIntegration.jsonas URL - To proceed, you have to click the blue icon
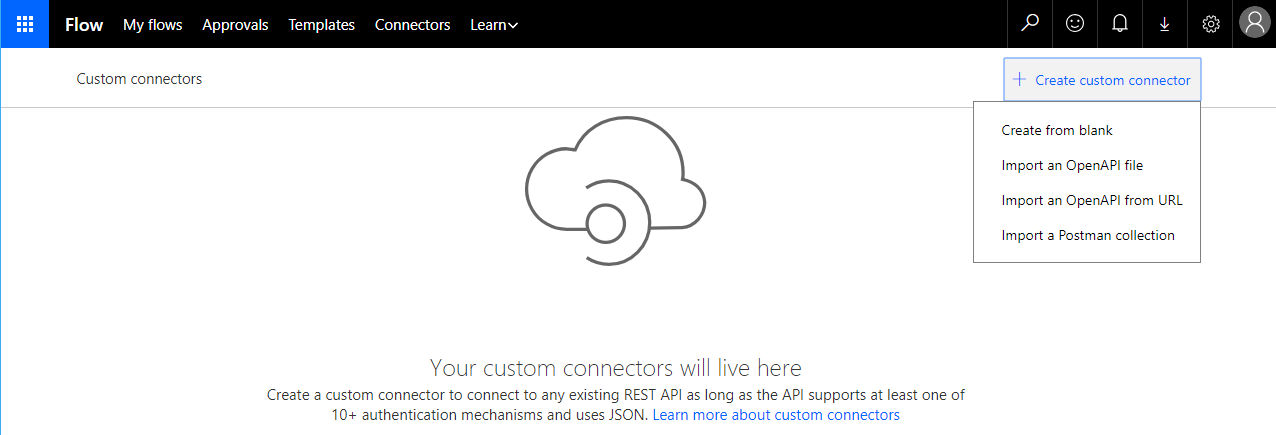
Create custom connector from Import an OpenAPI from URL

Import swagger definition by URL and press arrow afterwards
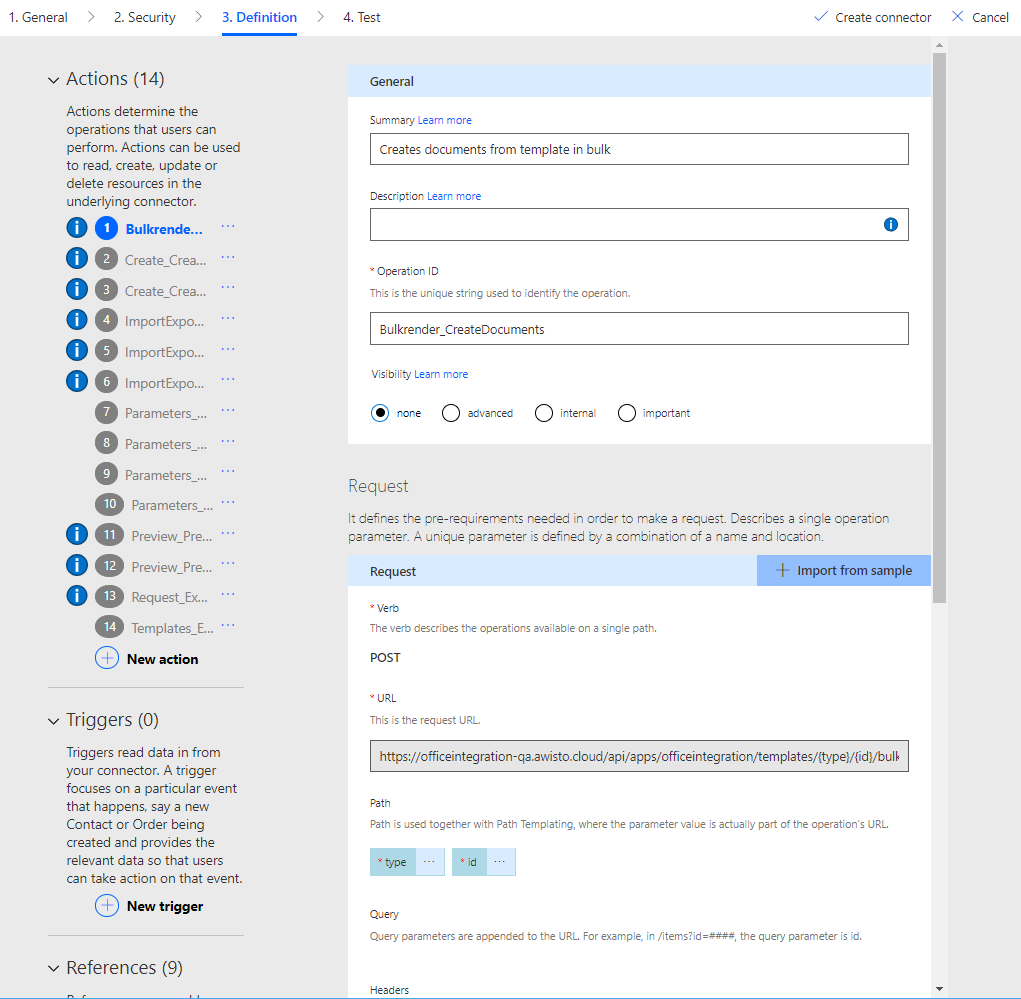
General Information
Within General Information, you need specify the following settings
| Setting | Value |
|---|---|
| Image | You can download an icon here |
| Icon background color | #004769 |
| Description | awisto OfficeIntegration is your one-click document automation solution for Microsoft Dynamics 365. |
| Schema | HTTPS |
| Host | officeintegration.awisto.cloud |
| Base URL | / |

Update the General Information with the settings above
Security
Within the security setting you need to configure these settings as described within the screenshot below
| Setting | Value |
|---|---|
| Authentication type | OAuth 2.0 |
| Identity Provider | Azure Active Directory |
| Client id | The application id, you have extracted within the fourth step |
| Client Secret | The secret you have created within the fourth step |
| Login URL | https://login.windows.net |
| Tenant ID | common |
| Ressource URL | https://officeintegration.awisto.cloud |
| Scope | user_impersonation |
| Redirect URL | do not change |
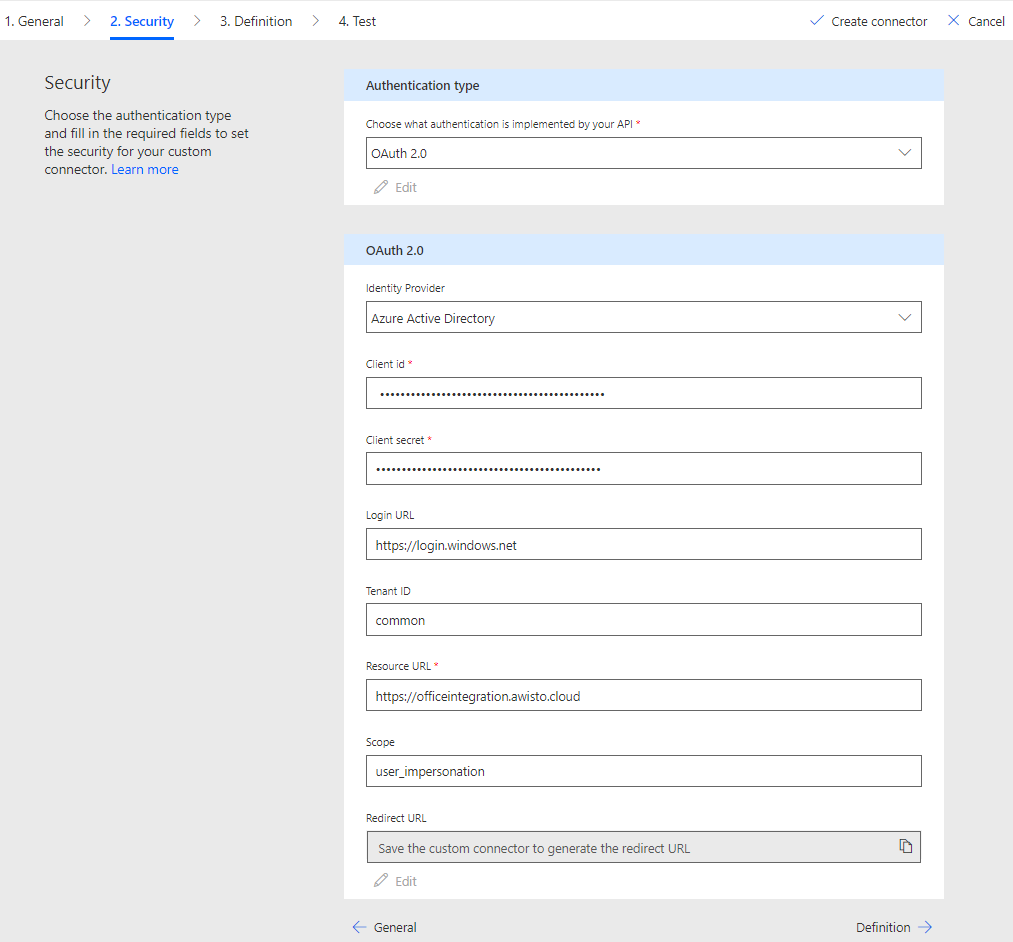
Required security settings
Create Connector
Click in Create connector. You have successfully set up the Connector.
Connector created
Reply URL
The last step is to extract the Reply URL from the Connector. Please click on the Connector you created shortly before. You will see a short description of your Connector with the Reply URL Microsoft Power Automate will use. You need to add this Reply URL as Reply URL of your Azure AD Application.
- Navigate to Azure Portal and sign-in
- Select Azure Active Directory, App registrations
- Select the application you have created in Step 1
- Navigate to
Authentication - Add the Reply URL you have copied from the Connector as Redurect URI
- Press the Save button
Warning
If you update the connector later, you may need to open each flow using the connector and save the flow again with no change
Congratulations, you have completed the installation.